
Design vocabulary has been quietly rewriting itself, and almost every new term that's landed in the last two years has either “code” or “AI” folded into it. As design moves closer to code, the language we use to describe the workflow is changing with it.
The design workflow used to end at developer handoff, when a designer passed a file to engineering and stepped back. Now most teams call it the design-to-code workflow, as designers have moved closer to engineering and started working with the same repositories, tokens, and component libraries.
At Eleken, we sit on that side of the line. We've spent the last while rebuilding how we take a product problem all the way to an implementation-ready interface. In this article, we’ll show you where the Figma to developer handoff breaks and walk through the exact workflow with the technical details and the lessons behind it.
The problem with the design-to-code workflow
Ask a room of designers where handoff goes wrong, and you'll hear about developers. Ask on Reddit, where nobody's manager is reading, and the answers get more honest.
One designer in r/UXDesign put the structural version of it plainly:

Lack of process and accountability.

His reasoning was simple. If there's no required design QA step and no time budgeted to polish, “things will come out unfinished.” He had a second, less diplomatic theory that frontend isn't treated as a serious engineering discipline at most companies, which leaves interfaces in the hands of whoever is available.
That's the shape of most failures in a traditional design handoff workflow. They’re the predictable result of a product design process where one static file has to carry every decision, leaving anything it doesn’t cover to whoever is closest to the deadline.
Here's what that looks like in practice.
- Design files go stale in days. A Figma frame is a snapshot. The codebase keeps moving, the design keeps moving, and by mid-sprint the team is working from four competing sources of truth.
- Values get guessed. A mockup shows what something looks like, but not the rules behind its padding, layout, or colors. Developers fill in the gaps, and those small guesses add up until the design system starts drifting.
- Half the interface was never designed. Error, loading, empty, and permission states often never make it into the file, leaving developers to fill those gaps differently each time.
- The library in Figma isn't the library in the repo. In a Figma to code workflow, the two component libraries drift apart, and every new feature pushes them further out of sync.
A designer on Reddit described what happens when designers finally see their work running:
When designers lay their hands on the living incarnation of their figmas, they only then truly understand their blind spots and can only then come to a reasonable expectation of how to fix the gaps in their designs.
The problem goes beyond how developers interpret a design. Even the person who made the mockup can’t fully evaluate it until the interface actually runs.
Which means the traditional workflow asks every design decision to be judged twice. Once as a picture, when changing it is cheap and seeing it clearly is impossible. Then again as working software, when seeing it clearly is easy and changing it costs a sprint.
Everything teams call design drift grows in the gap between those two moments. Close the gap, and most of the rest of this stops being a problem you manage.
The design-to-code workflow, phase by phase
What follows is the workflow our designers use on client projects. It comes from our own experience, and each phase is there because we ran into a specific problem without it. The details will shift with your stack and team, but the order of the phases is the part we'd keep.
Phase 1. Start with evidence, not a screen
Before anyone opens a design tool, the designer digs into what's failing. Coding tools make it possible to build fast, which also makes it possible to build the wrong thing fast. So the first job is deciding which problem deserves a prototype at all.
The evidence usually comes from three places:
- Product analytics and funnel data show where users drop off.
- Support tickets and user feedback show what they struggle with.
- Interviews and usability sessions show why.
These sources disagree more often than you'd expect, and the disagreements are the useful part. A drop-off with no matching tickets usually means people are uninterested, and that's a different fix entirely.
On an existing product, this usually means a flow-by-flow audit of the running app rather than a review of the Figma files, since the two have often drifted apart by the time anyone looks. That's why a redesign at Eleken usually starts with a UX audit of the live product. It gives us a map of existing problems before we touch anything.
The phase ends with three things written down: the problem, a hypothesis about what's causing it, and the metric that should move if the fix works.
Phase 2. Get the product running locally
Next, the designer gets the actual product running on their own machine. In practice, that means cloning the repository, installing dependencies, setting up environment variables, and connecting the app to a staging or seeded database so screens show realistic data.
The first setup usually needs a developer's help, mostly for access and configuration that live in someone's head. After that, the designer pulls the latest changes and starts the app themselves. From then on, they design against the real product.
For a redesign, this goes hand in hand with the audit. Clicking through real states with real data shows what screenshots hide: the table that breaks with forty rows, the name that's too long for its card, the permission that hides half a page. This is usually where the first surprises show up.
Phase 3. Build the design system before bringing in AI
AI tools generate interfaces quickly, but they only follow rules that exist. So the designer sets up the system in Figma first, defining the tokens, components, and rules for using them. Then generated work has something to obey.
Roman, UI/UX designer at Eleken, puts it plainly:
Build the design system in Figma, advance with AI, and push it into Storybook, so a change lands across the product instead of in one place.

Roman Kalinin
UI/UX designer at Eleken

On the technical side, the setup covers four things:
- Design tokens. Color, type, spacing, and radius are defined in Figma with Tokens Studio and exported through Style Dictionary, so the same values exist as variables in code.
- Code Connect. It maps each Figma component to its counterpart in the codebase, so an AI agent reading the design gets a reference to your actual button.
- An inventory of the existing library. The designer reads what already exists before adding anything, so new work reuses rather than reinvents.
- Repo access for the agent. Read access to the frontend is enough for the agent to see file structure, naming, and conventions.
Skip this order and every generated screen invents its own patterns. The screens may look right, but the code comes back full of hardcoded values and near-duplicate components. With the references in place, the same prompt returns code that calls your existing button, spacing scale, and breakpoints.
This is the least interesting part of the design system workflow and the one everything else depends on. On our projects, it happens once at the start of an engagement and then grows with the product.
Phase 4. Explore structure in code before visual polish
This is where UI design to code happens in practice. With the system in place, the designer settles the structure before spending time on visuals. Using Claude Code, they generate several prototypes that test different layouts and flows, each with its own visual hierarchy and way of interacting.
At this stage, changing the structure costs hours rather than a sprint.
Each direction lives on its own git branch, and each branch gets its own preview URL. Hosting platforms like Vercel and Netlify can generate one automatically for every push. Stakeholders click through working interfaces, and nothing half-finished leaks into what they're reviewing.
Because the prototype actually runs, states can't be skipped. Empty, loading, error, and role-based views have to exist, or the screen visibly breaks.
Questions that a static file answers by opinion get answered by trying. Does this table work with forty rows? Put forty rows in it. What happens when a name is too long for the card? Type a long name.
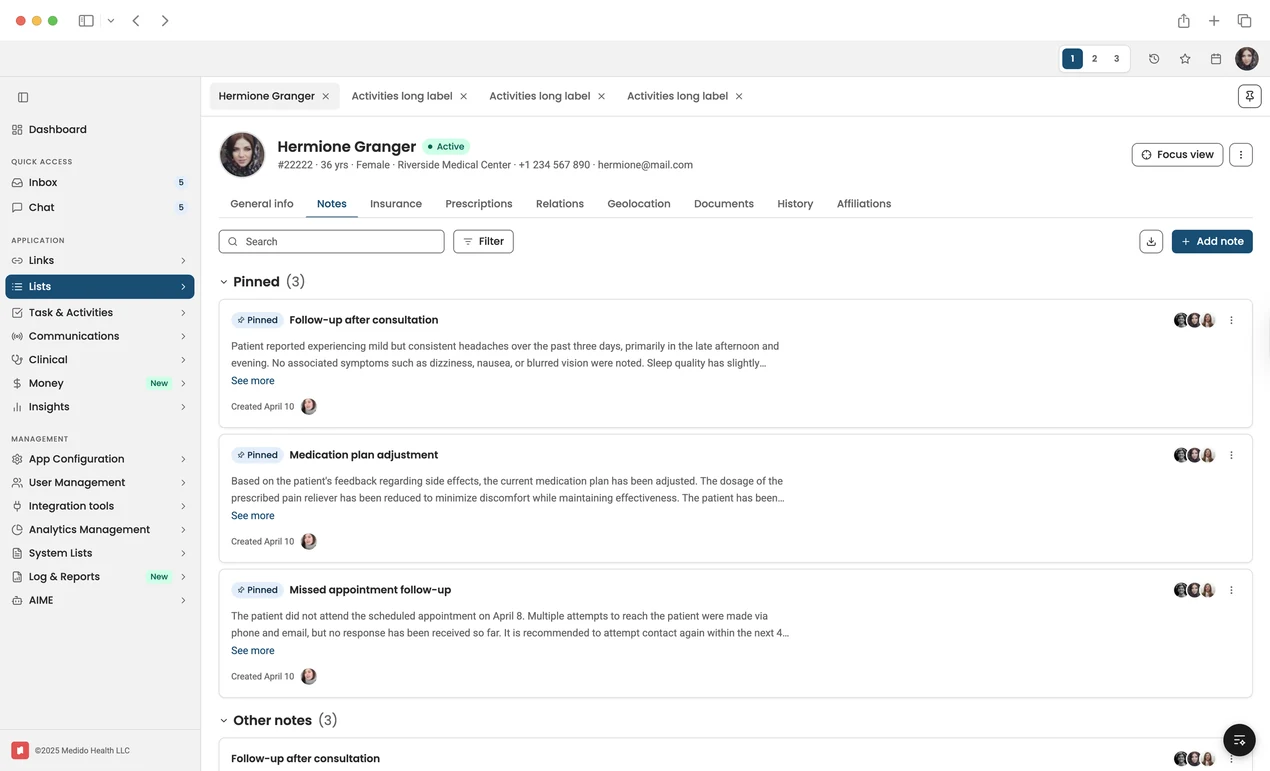
A Claude-generated healthcare interface prototype for navigating patient records, pinned clinical notes, communications, documents, insurance, prescriptions, and care-team activity from a single workspace.
On our projects, clients get an updated link every one to three days, and comments go directly on the prototype, next to the element they're about.
Review meetings get shorter because everyone opens the same URL. A question about what a viewer sees versus an admin gets settled by switching roles, and a question about mobile by opening the link on a phone.
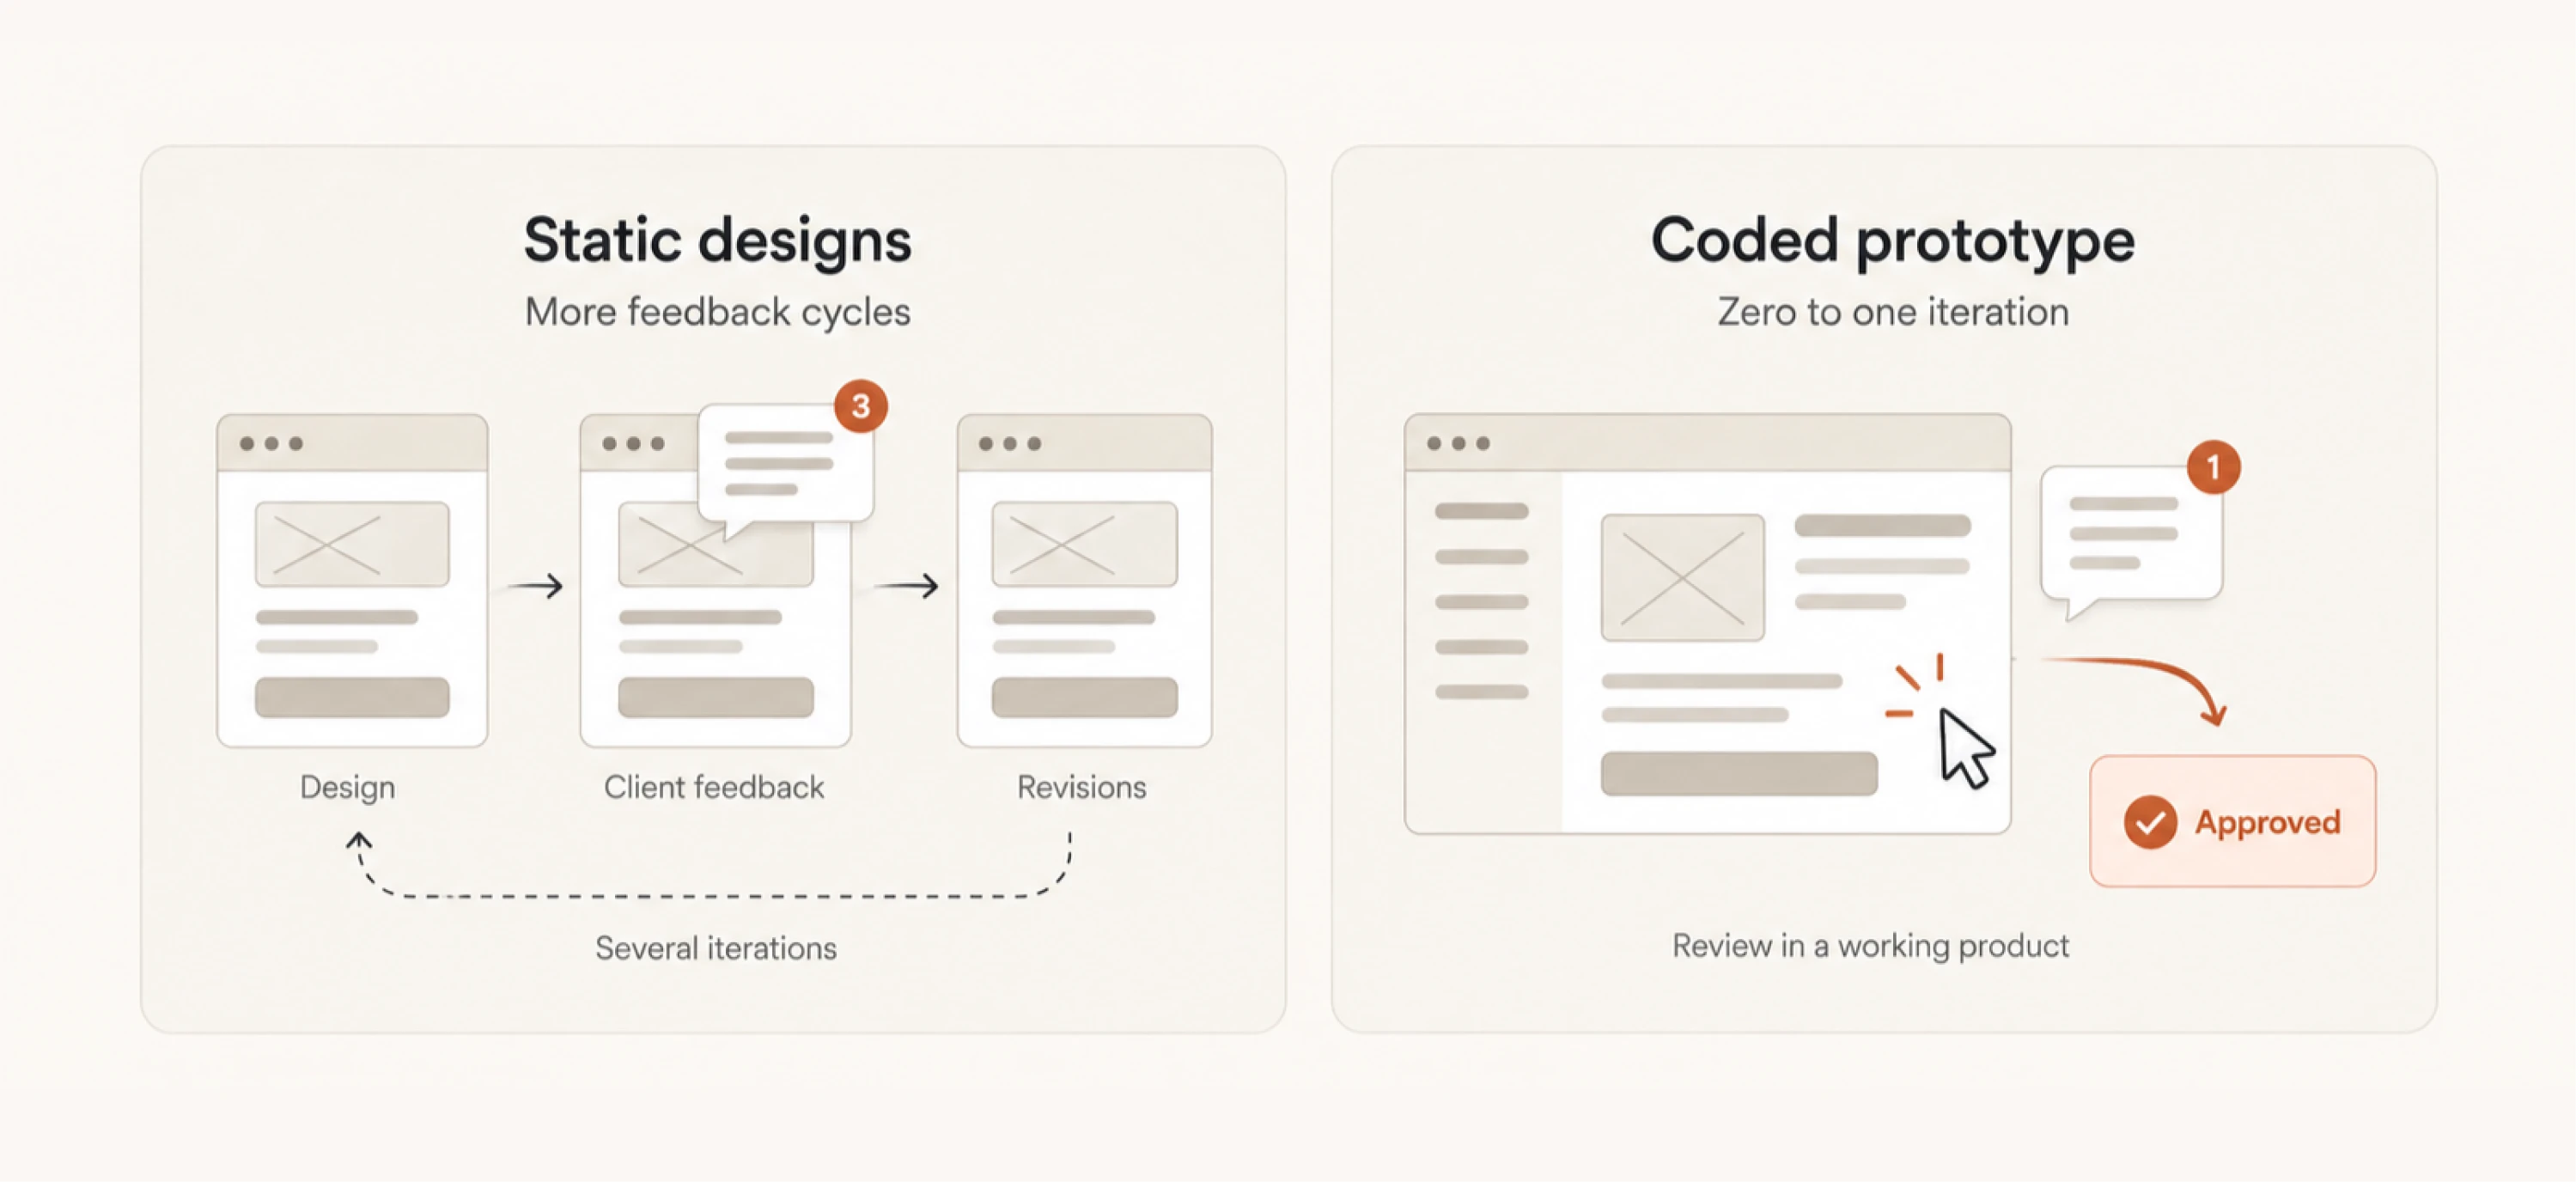
Running software also exposes disagreements that stay hidden in static files. Two stakeholders can approve the same frame while picturing different things. Once they use the product, the difference shows.
Figma doesn't disappear. Our designers still use it to work through visual decisions before bringing them into code, but nothing waits for a frame to be approved.
Phase 5. Write the reasoning down as a file
Code shows what was decided, but not why. So the exploratory thinking happens first in a general AI chat, where several approaches can be compared side by side, along with their tradeoffs, the user's perspective, and rough sketches.
Once a direction is chosen, the designer writes the conclusion as a short markdown file and commits it to the repository next to the code it explains, for example docs/decisions/onboarding-flow.md. A useful summary covers the problem and metric from Step 1, the directions considered and why they were dropped, the chosen approach with its tradeoffs, and any open questions.
Whoever picks up the code next inherits the reasoning along with the result. That applies to people and models alike. A developer reviewing the pull request reads it for context, and an AI agent working in the repo reads it before making changes, so it doesn't undo a decision it doesn't understand.
Phase 6. Send the work through normal engineering review
The designer's code goes through the same process as anyone else's. They commit to a branch, push, and open a pull request.
The repository's existing CI runs as usual, including linting, tests, type checks, and any automated code review the team uses. A preview environment spins up with its own URL, so reviewers can check the change running instead of reading the diff alone. Developers review it and decide what to merge.
This is what makes the product design workflow safe for engineering teams. The designer isn't bypassing anything, and the work arrives in a form the team already knows how to evaluate.
In a traditional design implementation process, developers spend a good part of their time reconstructing spacing and UI decisions from a mockup. Here, they can focus on the parts only they should handle, like connecting the interface to real data, authentication, backend behavior, and the rest of the architecture.
Where the environment allows it, our designers take the work all the way from design to production, building directly in the client's repository and pushing UI changes to a dev branch. Where it doesn't, we hand over a working frontend in a separate git project, built from the same tokens and components. Either way, we agree on the setup with the engineering team before the first commit.
After release, the designer compares the shipped product against the approved prototype and fixes anything that drifted. This is usually quick because both were built from the same components.
And since Step 1 set a metric, we check it once the product has had time to generate data. Sometimes it confirms the hypothesis. Sometimes a flow that tested well underperforms, which usually means the problem sits earlier in the user journey. Either way, the result becomes evidence for the next round of work.
Throughout. Storybook as the shared reference
In a design-to-development workflow, both sides need one reference they can trust, and for us that's Storybook. It holds the design system as running components, with every state documented (default, hover, active, disabled, loading, error, and empty).
It also covers role variants and edge cases, like an empty list or an account with ten thousand records. Developers take components directly from it instead of rebuilding them, and designers see what the product actually has, not what a Figma file claims.
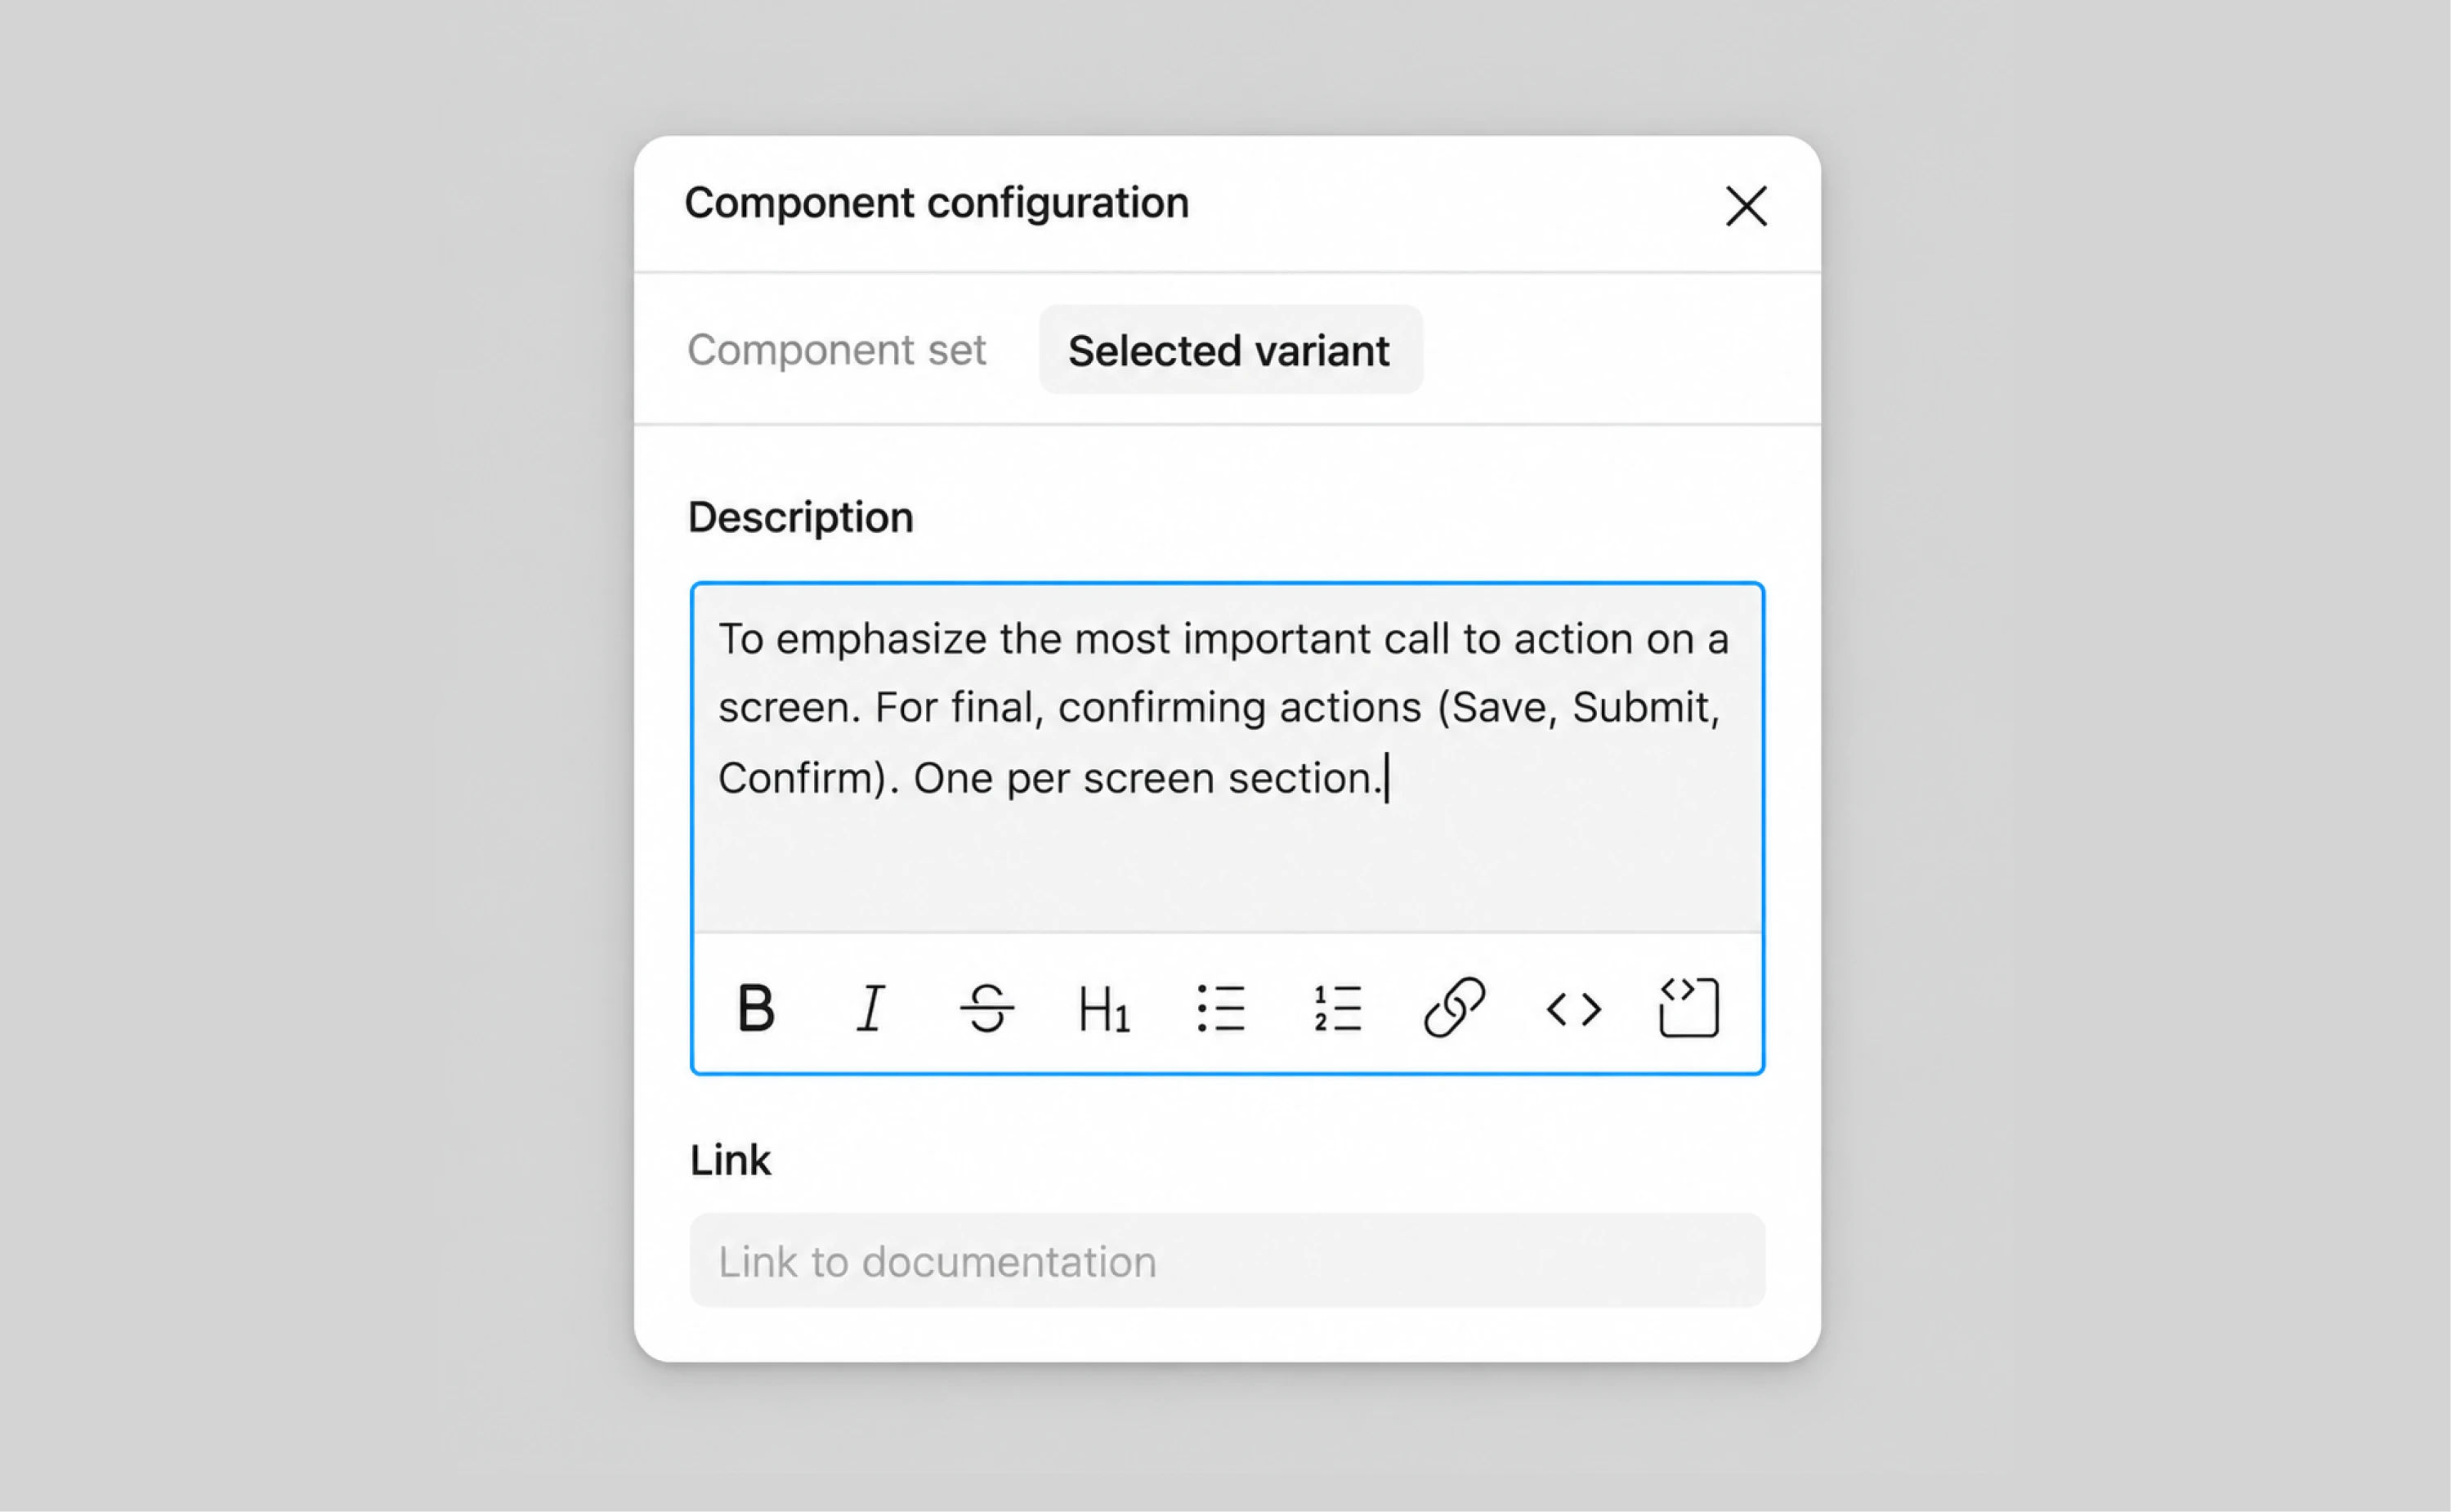
We applied the same approach while working on Onit's design system. Our designer noticed that engineers were using AI to build screens, so we made the system easier for AI to work with. For each component, we added a plain-text explanation of how it should behave, what could be changed, and what should stay fixed. This gave AI clearer instructions and helped the engineering team move faster.
A few caveats from practice
Phases 3 and 4 overlap more than a numbered list suggests. On most projects, design system work and exploration happen in parallel. The workflow also has a few prerequisites, including repository access, some developer time for setup, and a stack the designer can run locally. Without them, parts of the workflow still help, but the designer is back to working from a reconstruction of the product.
What keeps design and code in sync after the first ship
Drift rarely happens all at once. It starts with a hardcoded color here or a slightly different spacing value there. Eventually, those small differences add up and take real time to fix. Keeping design and code aligned requires each value to have one source and a reliable way to carry changes across the system.
Tokens give every value a single source.
Color, type, spacing, and radius are defined once and referenced everywhere. On Newton360, we built the system around this layer. Every button, input, card, and dropdown pointed to a token, so changing the primary color or border radius required one update.
That setup became especially useful when the client asked for a light theme after the product had been designed dark first. Reworking every screen would have taken considerable time. With variable modes in place, the components adapted automatically when moved into a light mode frame.
Storybook keeps the component rules in one place.
Documenting every state with the code alongside it is the baseline. For Newton360, the documentation went further and covered anatomy, use cases, do's and don'ts, naming conventions, behavior with different content lengths, and WCAG contrast notes.
The result was simple. Throughout the project, developers never had to come back to our designer to ask how a component should work. That tells us much more about the quality of a design system than the amount of documentation it contains.
A designer on Reddit described a similar experience inside an engineering team:
WBy the time I get to “handoff” with my engineers there’s no surprises because they’ve been involved throughout the process, handoff is pretty informal. And as I’ve been working with them and gotten to know them they’re much more likely to put in a little extra effort to match designs or improve a feature.
Tokens, shared components, and Storybook give the team a common system to work with. Keeping engineers involved throughout the design process helps that system stay aligned as the product continues to change.
Anti-patterns that reintroduce drift
Drift can return even after a team has built a design system, adopted tokens, and started using AI agents. Usually, it happens when parts of that system stop sharing the same rules.
- A design system that exists only in Figma.
A component library in Figma needs an engineering counterpart. Once the Figma library and the codebase develop separately, every new feature gives them another chance to move further apart.
Our clients often point to this as one of the hardest gaps to close. Building the Figma library is only part of the work. The components in the repo need to follow the same system.
- Screenshots as specs.
A screenshot shows the final appearance but leaves out the rules behind it. It doesn't tell a developer which token produced a color, which component should be reused, or how the layout behaves at a narrower breakpoint. Those decisions then have to be made during implementation, often with very little context.
- Manual transcription.
Reading values from a Figma panel and typing them into code creates plenty of room for hardcoded colors and slightly different spacing values. Repeat that across dozens of components in a sprint and small differences quickly accumulate.
- AI agents without the setup.
An agent needs the same structure your team relies on. Without a token layer and Code Connect mapping, it can generate working screens with hardcoded values and duplicate components very quickly.
How you prompt Claude Code with Figma matters too. Giving it an entire page at once can overload the context and produce broken output.
At Eleken, we use the Figma MCP server to scan the structure first, then request only the specific nodes we need. Layer naming matters for the same reason. "Frame 47" and "Rectangle 12" give the agent very little information about the component structure it is supposed to build.
- Designing without developers involved.
Technical constraints are much easier to account for while a design decision is still open. Developers can flag when a new interaction adds complexity or when an existing component already solves the problem. That's why our design team joins client standups and works inside the same sprints as the engineering team.
All of these problems create gaps where someone has to interpret a design decision on their own. The more of those gaps the workflow removes, the easier it becomes to keep the shipped product aligned with the design.
Final thoughts
Design and implementation used to be separated by a gap that developers had to fill through interpretation. Tokens, Code Connect, working prototypes, and Storybook bring those two sides much closer together. By the time development starts, many of the decisions that used to live in a Figma file already exist in working code.
We rebuilt our process around that, and it changed the conversation with clients more than we expected. Reviews now happen inside a working product, and approval builds over several iterations. The question “does this work?” appears much earlier in the process, while there is still plenty of time to change the answer.
If you want to try this workflow on your own product, you can start with a trial task. Our dedicated designer works on a real product problem for three to five days, so you can see both the working output and how the process works in practice.


.webp)
.webp)
.webp)