/
Design process

Adobe XD Design Examples: Simple and Inspiring Ideas

0

mins to read

Adobe XD is a relatively new design tool that was introduced only a few years ago. At first, the general public was quite skeptical about this product but with more updates coming out, Adobe XD has won the hearts of many designers and developers.

But why did Adobe XD become one of the most popular design tools in the market so fast, especially with such strong competitors as Figma and Sketch? What makes this product stand out from the crowd? We will answer all these questions by discussing the best features and benefits of Adobe XD in this article. 

Adobe XD: a breakthrough in the design world

Adobe XD was first introduced in 2016 while Sketch and Figma had already been in the market since 2010 and 2012 accordingly. To tell the truth, the beta version of the new product did not impress the users. However, after Adobe XD introduced repeat grid and prototyping, designers could not stay indifferent.

The secret of such rapid and unexpected success is better functionality compared to other design tools. Adobe XD brings to the table features that designers needed for many years. For example, even though Figma also has a repeat grid, the same feature in Adobe XD is much better and easier to work with. That is why more and more designers shift to Adobe XD instead of sticking to older design software that offers no new solutions. 

Adobe XD design examples: best features

We’ve prepared a short overview of Adobe XD finest features for you to get familiar with what this design tool can offer. 

Artboards

Adobe XD offers a whole range of artboards to start your design process. These are the different design areas of any size and shape that can be adjusted according to your needs. For example, you can choose Adobe XD templates for Windows, Android, and IOS, depending on the product you are working on. 

It also means that you can create pages for a few platforms (web and mobile applications) in the same project in Adobe XD. 

Adobe XD Design Examples: Artboards

Free kits and tutorials

Adobe free resources, such as numerous video tutorials that overview most of the functions make this tool a learning platform for designers. You can watch a video on how to make the most of a certain feature and then, try it yourself. 

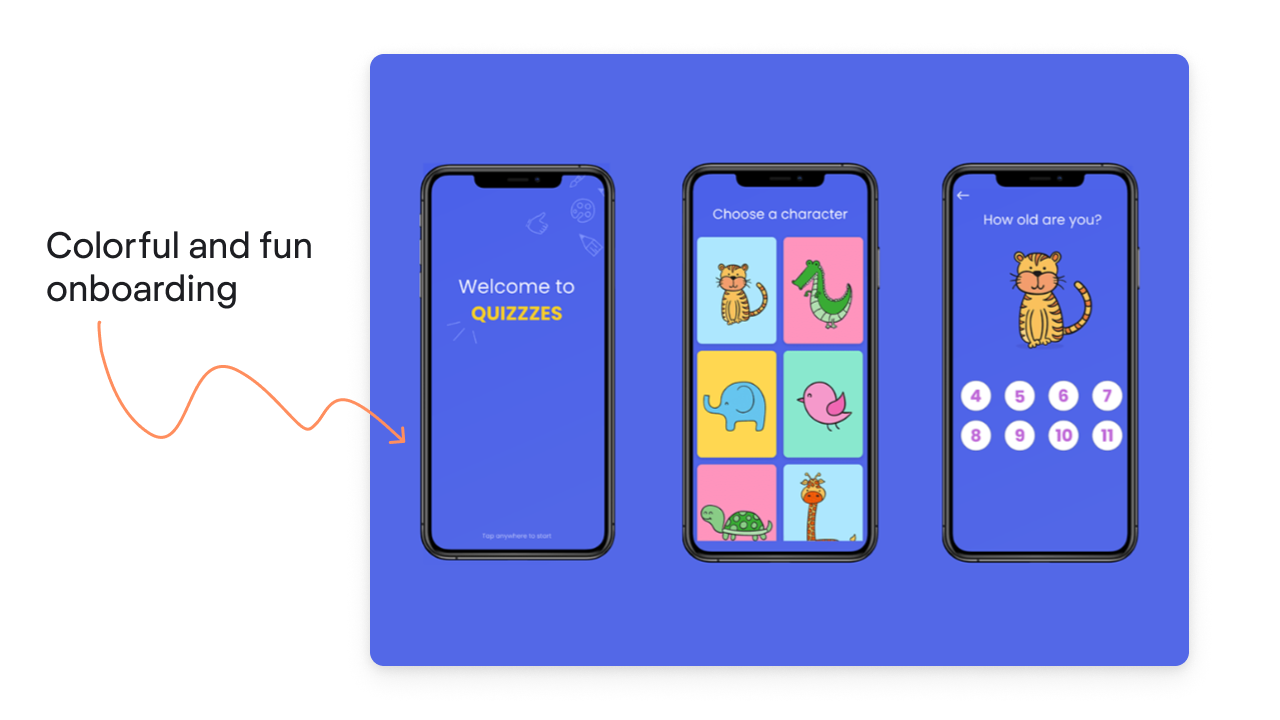
Free kits are a great opportunity to practice your design skills, especially if you are only a beginner in design. With such XD templates, you get access to various common pages and can improve them by adding your own details. 

For example, in the picture below, you can see Adobe XD UI kit for a workout mobile app with all the necessary pages such as the welcome page, progress page, and so on. 

Adobe XD Design Examples, free kits
Image credit: UIstore design

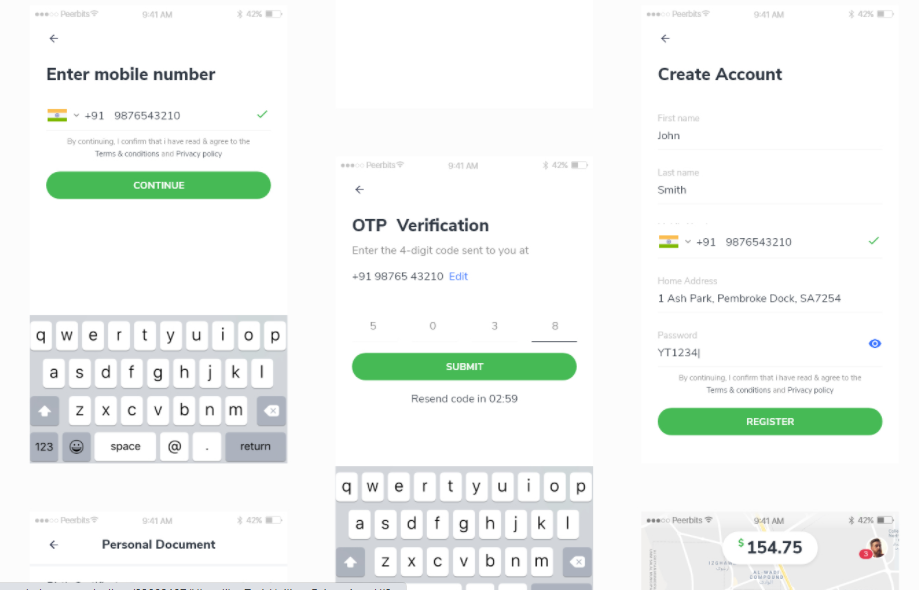
Another example is a free kit for a taxi-driver app, with such pages as creating an account, entering your personal information, and the interactive map with the cars available. By using these templates, you can learn more about how typical applications look like and what are the most common features that are needed for their users. 

Adobe XD Design Examples, free kits
Image credit: UIstore design

Icons

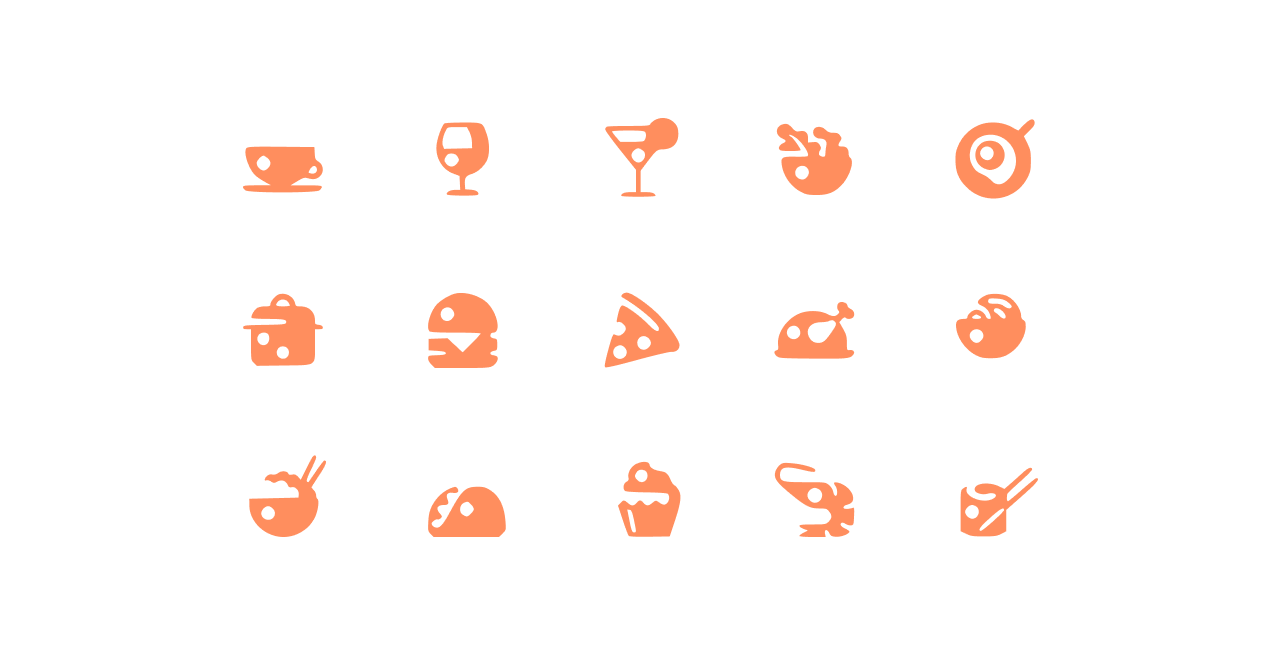
Icons make an essential element in designing any software product. These are the little images that signify the main features of the software and make the application easy and fun to use. In Adobe XD, you have many tools to create your own set of icons or redesign the already-existing templates. 

Adobe XD Design Examples, icons
Image credit: Behance

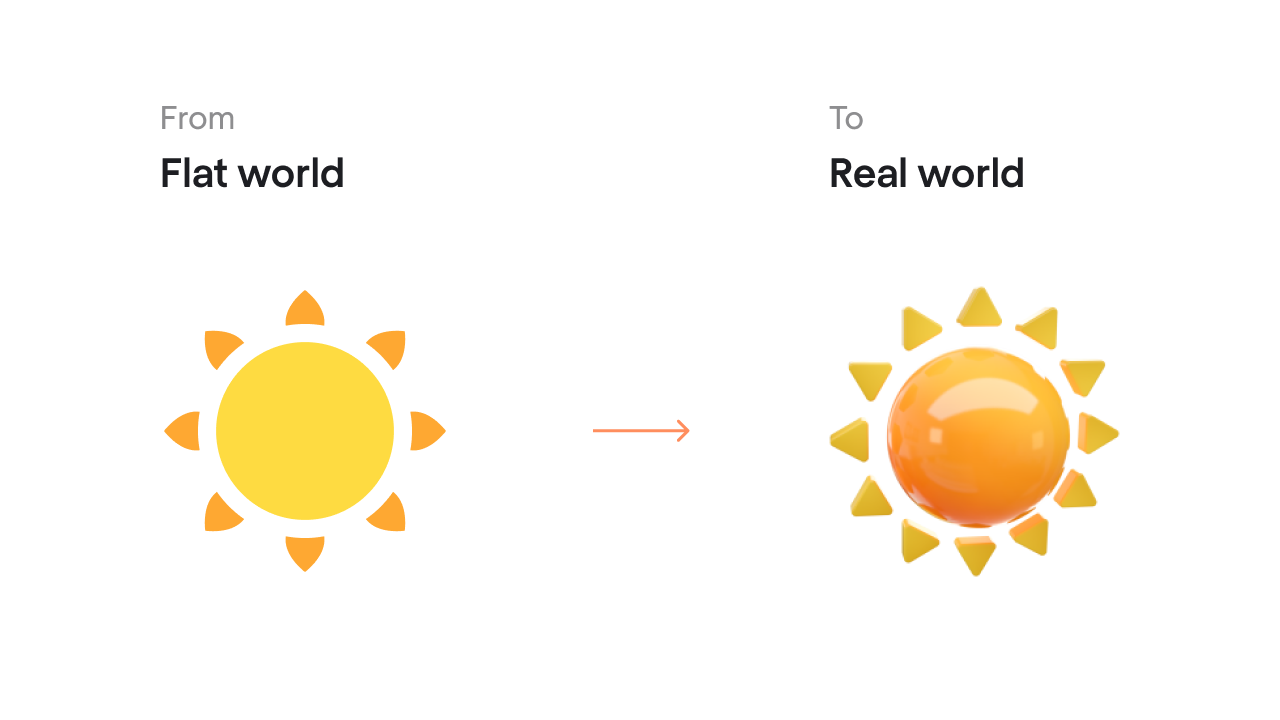
You can also make your icons more realistic and vivid by using 3d format, as in the next example. Consequently, the icon will remind users of real familiar objects that they can make associations with, instead of flat images that bear no meaning or emotional context. 

Adobe XD Design Examples, icons

In Adobe XD, you can create notification icons in different drawing styles. The following icons were designed for a social media application and show the most common notifications such as likes, comments, and new messages. 
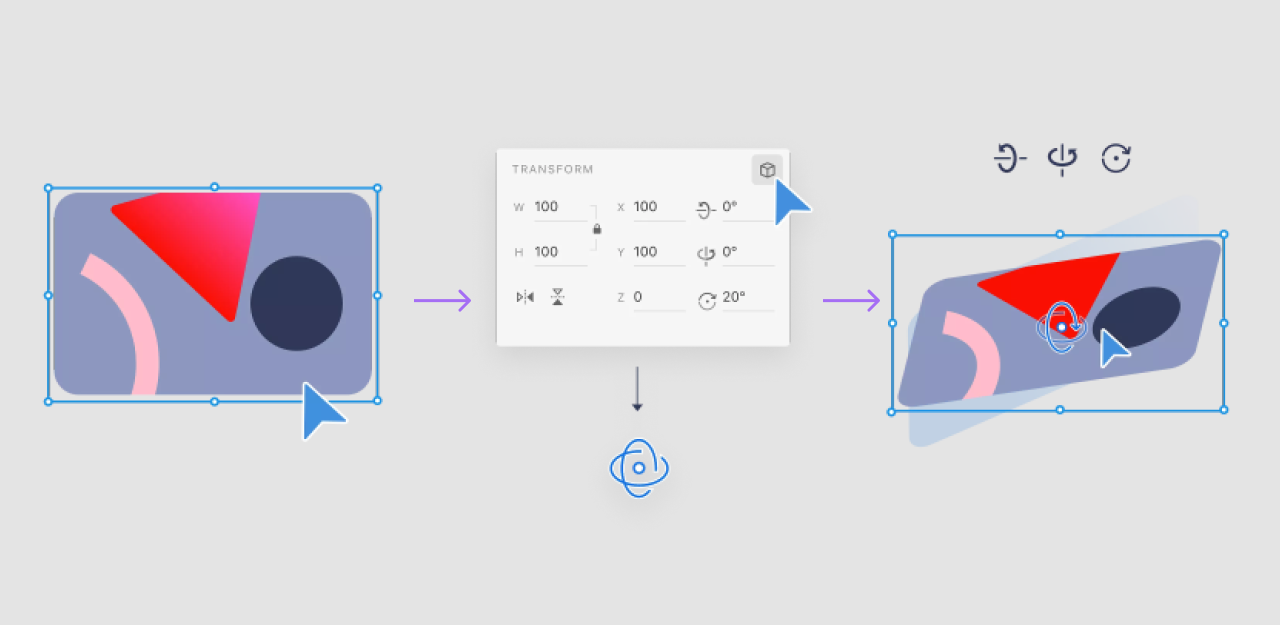
Adobe XD Design Examples, icons
Image credit: Behance

3D transformations

3D icons definitely take UI and UX to a whole new level. However, 3D transformations make them even better. With movable 3D icons, using your SaaS product turns into an engaging and unforgettable experience even if it has to do with such mundane daily tasks as ordering food or simply creating a new list. 

Adobe XD Design Examples, 3d transformations
Image credit: Behance

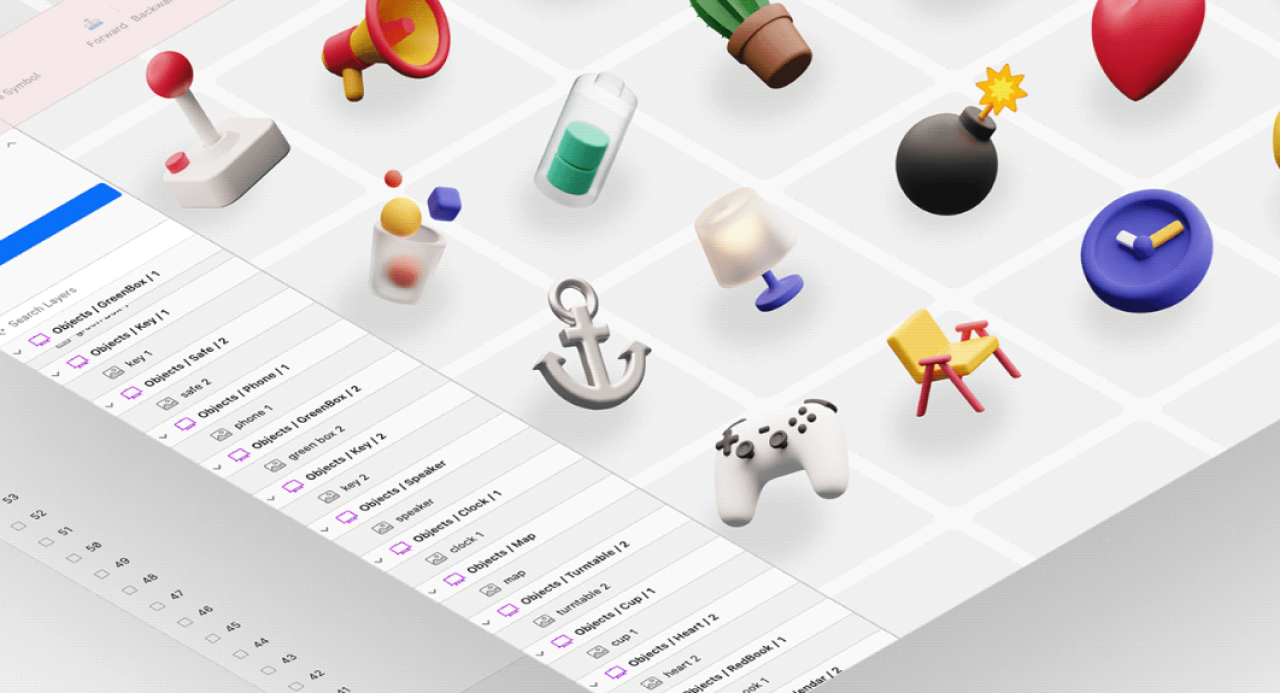
3D transformations come in handy for any SaaS solution. With 3D transformation, even an ordinary list of features becomes more distinct and memorable, as shown in the picture below. You can apply this feature to some of the objects to make them more prominent or use 3D transformation for all the elements to add more depth to your design.

Adobe XD Design Examples, 3d transformations

Fonts

Even though fonts seem to be less important than colors or images, they add the finishing touches to the design of your software solution. Just like accurate navigation, fonts can both attract or put off the users because they define how your product looks like. 

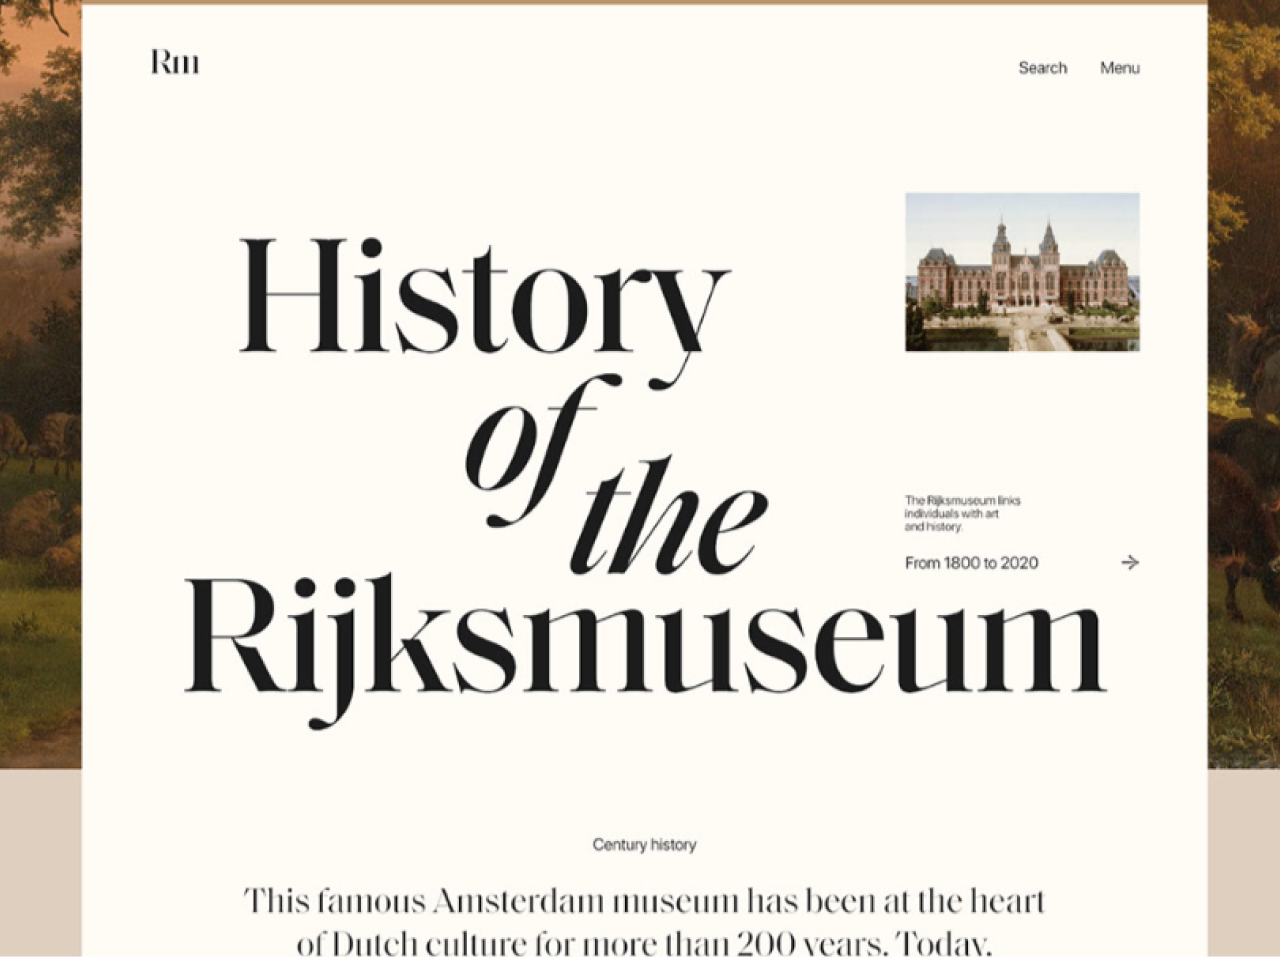
Adobe XD is a tool, in which you can play and experiment with fonts and styles to match the idea of your solution. You can even create your own font if you did not find the style you need. As you can see, the following font is a great match for the website of a museum and art gallery in Amsterdam as it is classy, artsy, and even a little bit romantic. 

Adobe XD Design Examples, fonts

In our next example, the fonts were designed for the organic spices website. The design of the website and the fonts themselves are made in different shades of green and represent an idea of a healthy lifestyle. 

Adobe XD Design Examples, fonts
Image credit: Behance

Repeat grid

The repeat grid is the feature that has gained the most recognition from Adobe XD users. Compared to other design tools, Adobe XD proves to have the best functionality for managing and designing the repeat grid.

The repeat grid includes such repeated elements as photo galleries, lists, and menus. In Adobe XD, you do not have to insert all the pictures or text in it manually. You can simply drag both the images and text into a canvas and even adjust the spaces between them. 

Adobe XD Design Examples, repeat grid

Such functionality does not only make the process of designing a repeat grid much easier and faster but also makes repeated elements look better from an aesthetic point of view. 
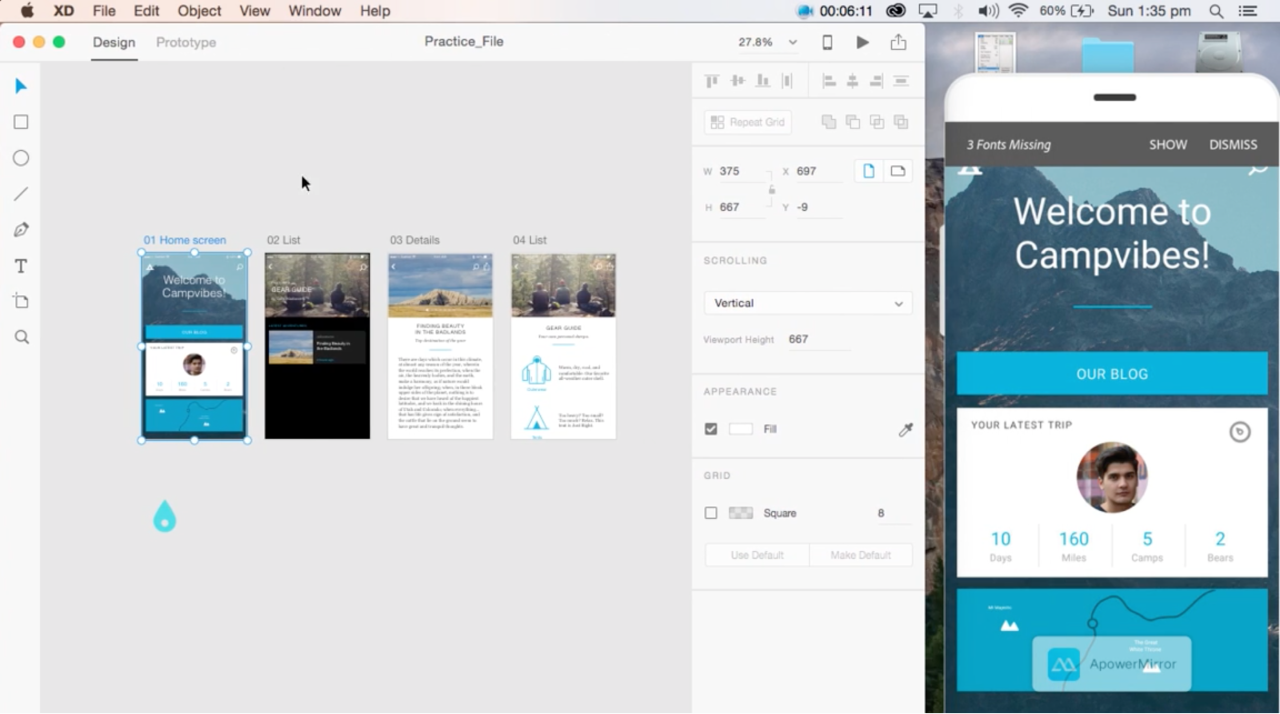
Prototypes 

Probably the most useful feature of Adobe XD is creating prototypes of your products. With Adobe XD, it is much easier and faster than with other design tools. You do not have to export anything but just review your prototype in a new tab. You can even click anywhere on any page to see how the user journey will look like in your SaaS solution. 

Adobe XD Design Examples, creating prototypes
Image credit: Behance

With a prototype tool in Adobe XD, you can also connect your phone to the computer or laptop and check how the design of the mobile application will look like. Without a doubt, such functionality allows you to check and fix any flaws or mistakes immediately. 

Adobe XD Design Examples, creating prototypes

Conclusion

Adobe XD built a reputation for an excellent design tool during a short time. With new updates coming out, its potential is also growing. A set of such splendid features as repeat grid and prototyping offers many possibilities for designing simple but creative and exclusive UI and UX.

With rich experience in creating UI and UX for different products, Eleken helps not only with the design of SaaS solutions but also facilitates their success in the market by making sure that these applications are usable and functional. You can find our contacts for any additional information on SaaS UI/UX design and our services here.

Author

Table of contents

Top Stories

Design process
/
0
min read

Design Thinking Ideation Techniques You Haven't Tried

In a world where we are obsessed with productivity and achievements, it is hard to accept the idea that we have to do something just for the sake of the process. That is the problem with many creative techniques.

As ideation is a part of serious work, people want to be practical and constructive. They don’t want to waste time on things that look like silly kids’ games. Because, why are we trying hard to come up with the worst ideas during the meeting? Shouldn’t we think of our business objectives?

“Creativity” and “thinking out of the box” have been on the list of top skills that all employers are looking for years. As a design agency, we value creative skills in our team — and we know well that it’s a thing that can be learned and nurtured.

Not sure if there are people who can come up with a bunch of great creative ideas on demand, but most of us need special conditions for that.

That is when silly kids’ games are necessary. To awaken that creativity in team members, all those weird activities really help. Imagining the ways of ruining the product, roleplaying the scenes, drawing them… Curious to know how it works? Read below.

Sketching

The main point of this technique is to draw and write instead of talking. When we visualize our ideas on paper, our thinking process works differently. We can’t express as much as when we’re talking, but we have better focus.

product design sketch
Image credit: matthieu mingasson on Pinterest

There are no rules: it can be a piece of paper for everyone, a flipchart, or a big whiteboard. Some people who are not used to thinking visually might find it intimidating to sketch and show their drawings to others. No need to be shy: it is not about our drawing skills here. Write, draw diagrams, schemes, sketches — what’s important is to let your creativity flow.

SCAMPER

The word SCAMPER stands for seven focus points:

  • Substitute
  • Combine
  • Adapt
  • Modify (Magnify, Minify)
  • Put to another use
  • Eliminate
  • Rearrange

We start with a product or a problem that we are working on, and go from S to R, each step gives us a new point of view. This method is all about asking questions, and the questions are more than just seven. 

Each word triggers a few questions. For example, it is not just “What can we substitute in our product?”, but also “Can we change the way our clients think of the product?”, “What if we substitute our target audience with another?” “Can we substitute our sales budget for marketing?”, and so on.

SCAMPER visualisation

Ask as many questions as you can think of, and come up with answers. The answers give us different perspectives on the product — and this is exactly what we are looking for in our ideation process.

This is one of the lateral thinking ideation techniques, which means that the solution is found through looking at the problem from a different angle and approaching the issue in a creative way rather than “rational”.

Brainstorming

When asked “what is the most popular ideation technique?”, most people would surely name brainstorming.

Of course, brainstorming won’t be a new thing for you. However, as a popular and effective method, it has lots of variations. Have you heard about brainwriting or figuring storming? There is a whole science behind this seemingly simple method. To learn more about it, read our article on brainstorming strategies.

Apart from those 7 methods described in the abovementioned article, there are many more “storms” that help us to generate new ideas. They deserve a separate book, but we’ll just list one of our favorites.

Crowdstorm

If you are familiar with crowdsourcing, you’ll understand what crowdstorm means. By “crowd” we mean people outside of the team: customers, fans, members of focus groups, social media followers, and others.

Tweet post asking for ideas for new features
Image credit: Twitter

The ways of connecting with a larger pool of people are various: sending out a questionnaire, tweeting the question, asking the participants of user research sessions, and so on. You can pose the question straightforwardly, or ask for ideas or associations, or pick a few ideas that you’ve already had and ask people to give feedback.

The side effect of this technique is enhanced user engagement: people love to be asked about their opinion. Companies that value the opinion of their customers have a higher level of loyalty.

Crowdstorm can become an introduction to the participatory design approach in your company. Involving all the stakeholders in the design process is an essential part of the holistic design approach.

Journey map

We are used to thinking of a customer journey map as a standard tool for improving user experience. However, they can be useful for generating ideas.

Image credit: LoungeUp

A map gives us a detailed view of all the aspects of user-product interactions. From this overview, we can focus on the points that need our ideas, or, on the contrary, see new opportunities in those parts of the user journey that we haven’t been thinking of.

A customer journey map is a strong tool for both empathizing and ideating. And don’t forget, there are also user journey maps and even employee journey maps. The principle of a journey map can be applied to other issues that are not directly related to user experience.

If you find that visual ideation techniques such as maps work well for your team, you would surely like the next one.

Storyboarding

A storyboard is a detailed scenography of some actions related to the product. For example, it can be episodes of user interaction with the product. You have to imagine an episode in detail: sketch it, write lines, try to feel the emotions, imagine different scenarios.

storyboard comic style
Image credit: Bryant Hodson

If the team feels comfortable with acting, they can even roleplay some short scenes themselves — whatever makes people feel relaxed and free to express their ideas.

Did you know that Airbnb uses storyboards a lot in its product design process? The inspiration for drawing episodes came from Disney’s Snow White. We have written how storyboards changed their way of seeing the business in the article about different types of customer journey maps.

Billionaire dream

The point of this ideation technique is to imagine a situation without any constraints. You have to ask just one question: “If we had an unlimited budget, what would we do with our product?”.

After we have imagined that ideal situation, we can think about which parts of it we can realize with the existing budget, as in the real world. 

“Dreaming big” is useful not only with personal objectives, but also with product design. We often tend to discard ideas before even pronouncing them because we believe that they are unrealistic. In many cases, these ideas are not as impossible as we think.

Reverse thinking

In this technique, we basically just flip the logic of ideation upside down: instead of thinking of the best way to solve the problem, we think of the way to worsen the problem, a way to create more problems, and so on.

Imagining the “worst” ideas can have two outcomes: you may “revert” these ideas to turn them into positive solutions, or you may just approach the whole thing as an “ice-breaker” exercise that prepares the team to express their craziest ideas freely.

Synectics

This method was invented by George M. Prince and William J.J. Gordon. Synectics is using the power of analogies, finding similarities in different things and differences in similarities.

First of all, you have to phrase the situation that you are working on. Secondly, we come up with an analogy, an example from a different sphere where the situation is somehow similar. When we have found a good analogy, we focus on it and stop thinking about the initial issue for a while.

Team members think of ways to solve the new situation. The ideas are collected and later applied to the initial problem. Some of them might not be applicable, whilst others can bring a completely new solution.

Mash-up

This technique was invented by IDEO, a design firm that was rocking design thinking before it became a buzzword.

As we know, innovative solutions don’t appear from nowhere: usually, it is just two previously existing things combined in an unusual way. That is what the mash-up technique is about: mixing two unrelated things to come up with new ideas.

Where do we find these unrelated things? First of all, we have to make a problem statement or the question (by the way, defining the problem properly is crucial for the other ideation techniques as well). The question should start with “How might we”. For example, “How might we make our customers order their medicines for delivery?”.

After that, we pick two categories. One of them should be related to our topic, another — not related at all. Let’s say it can be “pharmacies” and “Disneyland”. Give your team a few minutes to create a list of all the things that come to mind under each category.

Then take one item from each category and combine them in an unexpected way: for example, “painkillers sold by Mickey Mouse”. Don’t expect each combination to be a potential answer to the initial question. The objective is to generate new ideas, and only then evaluate them and see if there is something real.

How might we prevent monotony in office work? Category 1. Elements of working in an office  Category 2. Types of childhood play

To sum up

Ideation techniques are endless, just like good ideas. You can use one of these for inspiration, combine a few of them, or invent a completely new one. There is no single way to generate new ideas. The only rule is to express ideas freely and go beyond the frames of the most common way of thinking.

The main points of ideation techniques are:

  • make everyone feel comfortable to express anything that comes on their mind
  • ask unusual questions to get original answers
  • shift the focus from problem-solving to the creative process

So what can we do with all these crazy and genius ideas? That’s the next step of our work! Learn how to apply design thinking in product design in our article Design Thinking Examples: Five Real Stories.

Design process
/
0
min read

Brainstorming Templates for Your Remote Collaboration Tool

The world has changed dramatically in recent years. Now, 9-to-5 office work is not the only option for employers. More and more companies switch to remote (completely or partially), and are hiring outsource teams more willingly. Therefore, the need for efficient remote collaboration tools is higher than ever.

The guy from The Office Tv series says: "No more office routine?"

Since now is high time for developing tools that would simplify online teamwork, one of the killer features of such software is brainstorming. To seamlessly generate new ideas, the best and most convenient option for users will be to have ready-made brainstorming templates.

For that reason, our designers at Eleken built 12 creative brainstorm templates, accessible through Figma, to inspire you to make a more convenient way to ideate for your users.

Read on to see all templates.

12 brainstorming template examples for meaningful ideation

Brainstorming is a creative technique by which you make efforts to find solutions for a specific problem by governing a list of ideas. You can conduct brainstorming by yourself or with the whole team. 

As there are numerous brainstorming strategies and methods, they require different brainstorming diagram templates for more effective usage.

All of the templates you’ll find below are designed in Figma and you can freely use them for your needs.

Mind map

Mind mapping is a common and easy-to-use technique that works great to deepen the understanding of the issue, structure the information, find connections between concepts and easily follow the flow of ideas you came up with during brainstorming sessions. 

The way you organize mind maps is similar to how the brain works. That’s why this brainstorming session template is suitable for building user flows that help to understand how the customer sees and feels your product from their perspective.

How to use it

Mind map radiates from the center with lines that connect every other word to the main topic and it looks almost like a real map where all the streets converge on the city center.

  1. Select a problem/main idea and write it down in the center of a mind map.
  2. Provide as much background information on a topic as possible to your team.
  3. Create sub-ideas connected with the central topic. Add each thought that comes to your mind without filtering them (you can enrich the map with images, icons, or some references as well). 
  4. Find connections between different ideas.
  5. Review the map and do a post-mapping discussion with your team.

With the help of mind mapping, you turn tedious loads of data into easy-to-memorize and well-structured diagrams.

Lotus diagram

Lotus diagram helps to break down complex ideas into numerous related concepts which facilitates discussing the problem from different angles and seeing the broad picture.

How to use it

Lotus diagram is used for a lotus blossom brainstorming technique. The template itself looks like squares/cards with ideas written on them. And here’s how you are supposed to use it:

  1. Place the main idea, concept, or question in the center of a diagram.
  2. Think of eight related issues and put them around the central idea (a problem you are trying to solve is never a stand-alone issue).
  3. For each of those 8 ideas, you then create 16 more creative solutions, and so on.
  4. Study all the concepts you got at the outcome and analyze how they are connected with the central idea.

As you generate new ideas, the template resembles a lotus flower that unfolds petal by petal. To make this technique more effective, make sure your brainstorming team is diverse and you have representatives from different departments. 

Affinity diagram

The problem of brainstorming is that sometimes you end up with too many ideas that get cluttered, and it becomes difficult to get something useful out of all this information. 

Affinity diagram is used to sort generated ideas after an initial brainstorming session. With its help, you organize a large number of concepts and group them according to their affinity. That’s how you are able to carefully analyze all the ideas instead of focusing on one that caught your attention first. 

How to use it

Affinity diagrams consist of several blocks that contain ideas grouped by similarities. Here is an instruction on how to use this template:

  1. Note down all ideas that come to your/team’s mind without thinking about their order.
  2. Place thoughts that seem related on one side, thus forming several clusters.
  3. Create a header for each group that summarizes the main point of the cards below.
  4. Analyze each cluster.

Now an unorganized list of ideas that seemed complex to understand is simplified with the help of an affinity map. 

S.C.A.M.P.E.R.

The next template to brainstorm ideas is S.C.A.M.P.E.R.  S.C.A.M.P.E.R is an acronym with seven letters each representing a unique technique that can help you see the problem from innovative perspectives and find a creative solution. 

How to use it

The template has seven blocks (for 7 letters) and the main issue is put in the center. For each block you ask your team members to think about the solution of the problem using the following filters:

  1. S for Substitute. Think if there’s anything within the process/product you can replace with another element to make it better (the step in the development process, people involved, and so on).
  2. C for Combine. Think if you can merge two ideas to make it one, but more effective.
  3. A for Adapt. Think if there is anything that you can add to make the process/product work better.
  4. M for Modify. Think if you can make any changes so that you will receive a different process/better product. 
  5. P for Put to another use. Think if there’s any way you can use the product/process in a different way than its initial attended use.
  6. E for Eliminate. Think if there’s anything in the product/process that you can get rid of.
  7. R for Reverse. Think if there’s anything in what you are doing that can be rearranged to make the process better.

Passing your thoughts through so many filters, you will come up with innovative and great ideas.

How Now Wow matrix

Though your team can come up with numerous creative ideas during a simple brainstorming session, whenever it’s time to choose the best solution, people tend to pick up the one that is familiar to them and simple to implement. 

The How Now Wow matrix template will promote you and your team to think outside the box and evaluate each idea according to how original it is and how possible it would be to implement it.

How to use it

This template for brainstorming business ideas is a matrix that has “innovation” on the X-axis and “difficulty” on the Y-axis. 

  1. Set the topic and generate as many ideas as possible
  2. Add all ideas to a board and order them according to the following parameters: 
  • How (blue). Ideas for the future, dreams, or challenges that are innovative but difficult to implement.
  • Now (yellow). Ideas that are easy to implement, have low risk, high acceptability, but are usually not that original or interesting.
  • Wow (green). Innovative, breakthrough ideas that are possible to implement. Of course, you should strive to generate more of them.
  1. Ask your team members to choose the best idea for each cluster by adding a sticker in front of the idea they like most.
  2. Count stickers under each idea and order them. The biggest amount of stickers of a certain color categorizes the idea under that color.

As a result, you will receive ideas that you can start implementing right away, some solutions that you should continue working on, and some innovative concepts to have a direction for the future.

Reverse Brainstorming

In case you are bored with typical brainstorming sessions, try a reverse brainstorming worksheet template. This method tricks our brain and makes it think in a new way. 

Reverse brainstorming is an idea generation technique that works based on humans’ tendency to focus on problems more than on solutions we want to achieve. 

How to use it

  1. Determine the area in which you want to create new ideas.
  2. Reverse the problem. For example, if you want to improve customer satisfaction, then the reverse problem would be “how to disappoint our customers”.
  3. Think of what you can do to make things go wrong in this area (make customers wait long, ignore their requests, and so forth).
  4. Reverse the ideas you got and think of solutions to those issues.
  5. Evaluate the solutions.

Reverse brainstorming allows us to see new possibilities that we might never see right away. 

Mood board

Creative projects require creative methods. Mood boards allow you to articulate abstract ideas, express the mood of a project and your feelings with the help of visuals (images, typography, color pallets, and such).

This technique is broadly used for presenting and assessing your ideas with the team and gathering inspiration for your project.

How to use it

Mood board template is a vast canvas where your team can put their ideas in a visual format and add small notes/descriptions for better understanding.

  1. Define the main subject. What do you need the mood board for?
  2. Choose the areas of a subject you want to explore.
  3. Browse the internet or any other resources for inspiration ideas and upload them to the template.
  4. Divide visuals according to different purposes - colors, structures, texts, and so.
  5. Add short descriptions. Typing some text next to particular visuals will allow you to explain the direction of your thoughts.
  6. Analyze the board. Look at the general picture, ask your colleagues for feedback.

5-why diagram

Sometimes we have a problem that we don’t fully understand, a vague issue that comes to us on a moment-to-moment basis. 5 whys diagram helps us to break down such problems and get some facts that would take us to the root cause.

How to use it

The 5-why diagram is a chain of questions that promotes you to dig deeper and deeper to the root of a subject until you find a solution.

  1. Identify the problem you want to solve. 
  2. Think of the broadest question, answering which will explain to you the general (maybe obvious) reason for the problem.
  3. Take this answer and based on it think of the next question that would be more specific. 
  4. Follow the chain all the way down, until you find an answer that satisfies you.

Though this method is called 5 whys, it does not necessarily have to consist of five questions: in some cases, three are enough and sometimes you will need more than eight “whys” to find a suitable solution.

Disney creative diagram

Disney creative diagram came from Walt Disney Studios as a method of generating and evaluating ideas for film scripts or other projects. You can use it to solve a particular problem quickly in a really creative way.

With the help of the Disney diagram, a team adopts three different thinking styles: dreamer’s, realizer’s and critic’s views. That is, you discuss the issue from three different perspectives

How to use it

An important rule of this method is that the whole team should approach the problem from the same point of view at the same time.

  1. Start your brainstorming with the dreamers’ section that allows participants to share even the craziest ideas in a free form, without thinking about their feasibility. Dreamers often express their thoughts with “what if…” and they are looking for an ideal solution without constraints (What would we do if we had unlimited resources? What would a perfect solution be?). 
  2. Then move to the realists’ point of view. Realists are pragmatic and practical people, whose job is to turn dreams into reality. They are looking for feasible, profitable or attractive to customer ideas. Realists look through dreamers’ ideas, narrow them down and discuss those in a constructive way to work them up into a plan.
  3.  When it comes to critics’ turn, they take the plan that was developed by realists and analyze it in a critical, yet constructive way. They don’t mean to destroy the whole plan, but identify its risks and dangers. After defining the pitfalls, critics' duty is to make some suggestions as well.

With Disney creative diagram you can not only have a list of ideas, but also an action plan on how to implement them. 

Card sorting

Card sorting is a simple technique that uncovers the way target users think about certain information. It is often used by UX teams who want to organize the information architecture of the product correctly, create user-friendly navigation, and so on. 

How to use it

  1. Choose a set of topics with the same hierarchical level (about 50 items that represent the main content of the app/website).
  2. Put them all onto a template.
  3. Recruit target users.
  4. Ask participants to organize cards into groups that make sense to them.
  5. Discuss the result with each participant. Ask the user to explain the logic behind each group. You can also ask about difficulties that users faced during the task. 

Carefully analyzing the results from the card sorting template will give you an opportunity to create a product that meets users’ expectations.

Kano model

Kano scoring model is a framework designed to prioritize features based on the degree to which they are likely to satisfy customers. Weigh a high-satisfaction feature against its cost to implement to determine whether to implement it.

This strict focus on how customers will react to certain features is what differentiates the Kano model from other prioritization frameworks.

How to use it 

The Kano model works by understanding each feature you want to develop based on two axes. On the X-axes we have whether the feature is absent or present within your product or service. And on the Y-axes, we have how you expect the customer to respond to the feature, whether they are dissatisfied or delighted by the feature.

  1. Create a list of features you want to consider.
  2. Survey your customers.
  3. Brake these features into categories which are represented by the lines: 
  • Must-be. Features that customers expect to find in your product/service. They don’t cause high satisfaction, but in case you omit at least one must-have feature, customers feel deep dissatisfaction.
  • Functionality. The more customers get of these features, the more satisfied they become. These features are considered to improve the performance of your product in some way.
  • Attractive. These are features that your customer doesn’t expect to find, but they make your users delighted if they are present. If such features are absent, your customer is neutral.
  • Indifferent. These are features that your customer doesn’t care about, whether they are present or absent. 
  • Reverse. These are features that actually annoy your customers if they are present and make users happy if absent.
  1. Analyze the results.
  2. Priotorize the features you will implement.

Value proposition canvas

Value proposition canvas helps to deliver products that meet customers’ expectations and satisfy their needs. With this method, you can visualize the design and test how you create value for customers.

How to use it

The value proposition canvas is composed of two parts: the customer profile and the value map.

  1. Fill in the customer profile that helps you understand people you intend to create value for, It describes:
  • jobs your customers are trying to get done. Jobs can be functional, social, or emotional
  • pains that annoy customers and which they try to avoid. They can be dissatisfaction solutions, challenges, risks, frustrations, or obstacles related to perform a job.
  • gains which present how customers measure the success of a job well done. These are positive outcomes that customers expect to achieve, like concrete results, benefits
  1. Fill in the value map that shows how your product/service relieves pains and creates gains. You can use it to design, test, and iterate your value proposition. It describes: 
  • the list of products/services that your value proposition builds on
  • pain relivers which present how your product/services/features eliminate, reduce or minimize pains customers care about, making their lives easier
  • gain creators that present how your product/service/feature produce, increase or maximize outcomes and benefits your customers expect, want or will be surprised to receive by using your product
  1. Create clear connections between what matters to customers and how your product/service/feature decreases pains and creates gains.. 

Conclusion

All the above templates serve different purposes and are suitable for specific individual cases. That’s why offering your users a variety of different templates would make the brainstorming feature in your remote collaboration software more effective, creative and helpful.

Use our brainstorming templates as an inspiration to optimize your users’ daily routines and make their lives a bit easier and follow Eleken on Figma.  

Working on building a SaaS product for remote team collaboration? We can be your product design team! Learn more about our pricing model.

Don't want to miss anything?

Get weekly updates on the newest design stories, case studies and tips right in your mailbox.

Success!

Your email has been submitted successfully. Check your email for first article we’ve sent you.

Oops! Something went wrong while submitting the form.
Don't want to miss anything?

Get weekly updates on the newest design stories, case studies and tips right in your mailbox.

Success!

Your email has been submitted successfully. Check your email for first article we’ve sent you.

Oops! Something went wrong while submitting the form.